Our House

Our House
Before: House. After: Home!

Friday, April 29, 2016

Paint colors; Inside & Outside

So so so so many choices!
From left to right:
1st floor man cave
1st floor main area (none of these worked)
2nd floor office
Exterior
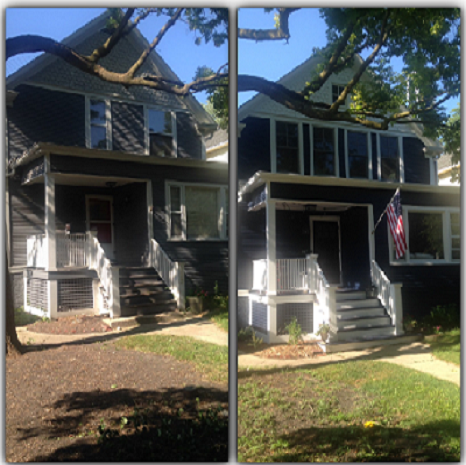
Exterior options

Chris painting (from left to right) exterior options
number 1-7

We took our favorite exterior options (#2 &
#3) and painted them around the house!
In the sun & shade, plus on the old &
new siding!
We chose #3 - shown on the right here!


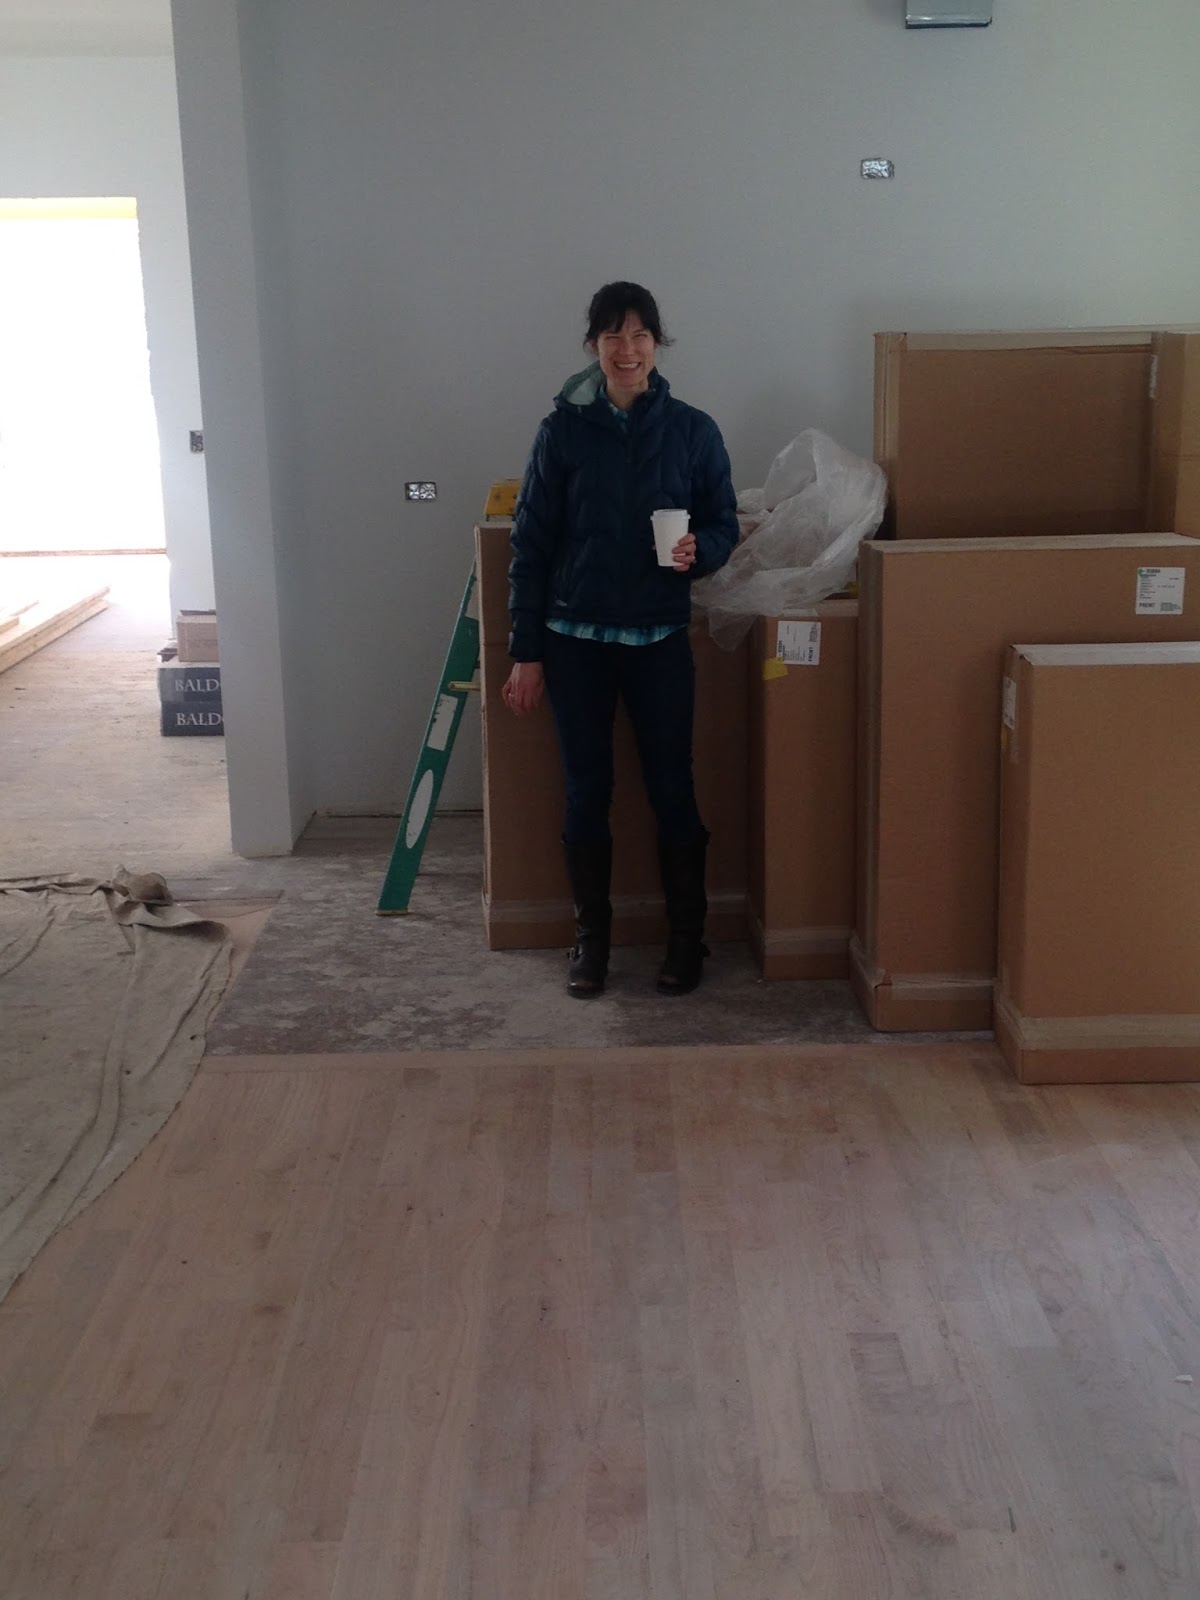
Some of our first efforts on the 1st floor color.
We wanted a light gray....darker than the white trim but
lighter than our cabinets. Harder to find than you'd
imagine! This includes living room, dining room,
 hall bathroom, kitchen, family room and our master bedroom!
I struggled mightily with this choice!

2nd floor color options - we wanted an off white that would
show off the trim but not be too bold. This paint is for
the foyer, front stairwell, upstairs hallway, guest rooms &
the hall bathroom. Bottom row center is the winner!

Gray, gray, gray.
I painted lots of color options on this wall
in the kitchen! We wanted to be as sure as possible we were
making the right choice! We went with the color on the lower
left (its repeated on both sides of the door).


We are rocking the man cave like it is
a transplant from our condo! It will be painted
brown & have virtually the same furniture :)

The winning man cave color is on the right.
The one on the left looks too much like a dirty diaper :(

Chris showing off the office window with the color
options. The darkest one won here :) Its in the center

I DIYed the basement laundry area wall....because it is in
the basement & it doesn't matter! The middle color won!
I wanted to go bold & fun. One might think this is too
dark of a color for a basement; I went high gloss to
bounce the light around the room. Our basement has some
above grade windows which give it some natural light,
which helps!


In case you care to buy any of these colors, we used all Benjamin Moore paints. Here is a list of what we bought & where we're using it:
Exterior: Deep Royal
1st Floor + Master Bedroom: Whitestone at 50% strength
2nd Floor + Foyer/Stairwell: China White
Man Cave: Whitall Brown
Office: Van Deusen Blue
Laundry Area: Old Navy

A new driveway & LOTS of machines


 When we embarked on the planning phase of this project with our architect, Tom, we had a few requests about the exterior of the house: lose the side porch on the west side of the house, build a new one on the east side (where the driveway is), keep the driveway for off street parking but shorten it to make way for a hefty (aka hardworking) side porch.

Just too tempting not too. My father-in-law
wondered if I have a new career path!
Too tempting not to....Chris driving the Bobcat on
Sunday
Welllllllllllll, the City of Evanston Zoning Department had other ideas. As it turns out, a driveway (in Evanston) must terminate a parking pad. The parking pad can be no more than 30 feet from the rear lot line. In our case, this puts our parking pad smack in the middle of our backyard! We didn't realize it, but we had a parking pad already - it was hiding under an awful lot of gardening paraphernalia and had a layer of weeds growing on it.
May, 2015: in the background of this photo you can see the area
that is our "parking pad" it was covered by a lot. I was
in no way exaggerating!
So, the good news? After the Zoning Department rejected our building permit application because our plans were in violation of the above referenced zoning code, Tom did a quick redraw. The new (& thankfully approved) drawings show our driveway being rerouted around our slightly narrower porch. Chris & I have been calling it the "S curve".

The bad news? Since this was a change made after we signed our contract, none of it is included in the price we planned on paying! Wah wah. 

It was fun to watch all the machines work on our property though! Check out the photos to see the progress they made starting Saturday April 16 and wrapping up by Wednesday April 20! Any toddler in your life would've loved these work days! The neighborhood kids sure did! We had the bobcat, mini bulldozer, dump truck, pumper truck (to pump concrete from the mixing truck into our crawl space which was also getting finished), cement mixing truck, along with an equipment truck & 3 pick up trucks. Our street is small. Our yard is small. We were overrun with giant vehicles!! Honestly though? It was really entertaining.
Bobcat delivery on Saturday


The old driveway before the demolition
got started

The old driveway with the planning of the
new driveway. You might be struck by
how similar the old
and new look :)

Here is a video of the mini bulldozer 
working with the bobcat to pull up the old driveway piece by piece!

Lots & lots of heavy equipment in the backyard!

I didn't think things in the backyard could get any worse.........and then a 4.5 foot high dirt pile rose up in the
middle of all the chaos. That was decidedly worse!

Old driveway is gone - bobcat is
grading out the space to make way for the new

Chris is admiring the concrete forms that are
part way put up. The forms require an
inspection by the City of Evanston. I
guess it is easier to adjust the forms than
the concrete once its poured!

Finished forms

Dad checking out the fancy new driveway...
or is he wondering why it looks nearly
identical to the old driveway?!?

We are for sure the classiest house on the block. The crime scene caution tape is
really sealing the deal!
But- here it is! The final product!
Of course we did :) Though not in the driveway, we
put our initials in the sidewalk that was patched on the
other side of the house. Because concrete is forever......
or 100 years or so!


Sunday, April 10, 2016

The Kitchen is IN!

I am so incredibly excited that our kitchen was installed last week! 

In 4 work days our trim carpenters, Pat & Eric, unpacked almost all of these boxes:
Kitchen cabinets in boxes

There were an awful lot of giant boxes!
And installed almost all of the cabinets! 
Cheers to the new kitchen!

Yippee! It looks just wonderful, even with the
cardboard countertops!

They built our island, 
It is hard to see the island; but it is hiding on the lower left of the photo
behind the garbage can & bag of joint compound (because of course
some of our brand spanking new drywall got torn out by the trim carpenters
in order to fully install our cabinets......#worthit #Ithink)

installed our barnwood beams in the ceiling, 
Our barnwood ready to be installed
1st beam is partway done
1st beam done, 2nd one waiting to be wrapped
and even gave us temporary cardboard countertops - which are very fancy and perfect for holding snacks and drinks :)
National Beer Day celebrations

Major Friday night snack attack waiting for Chris
to come home from work.

Delicious takeout for our first dinner party!

I spend so much of my time in the kitchen; I could not be happier about how ours is coming together! 9 more days until our countertops are delivered and installed; at that point it will feel really REALLY real! 

Update April 19, 2016:

We have our counters! They were delivered & installed today & they look wonderful!
Here comes the island!

Loving the way they look!

I've been having way too much fun with panoramic photos lately!

The island is almost done!

The very next day, the trimmers
installed our final (& largest) cabinet!
Now I just need to move in and start cooking!!

Stripping and Scrubbing New Life Into Old Door Hardware

Holy Moly. When our trim carpenters took our doors out of the house to clean them up, I kind of thought they would also be cleaning up the hardware. They would have - they absolutely would have cleaned up the old hardware; buuuuuuuuuut we would need to pay for their time to do it. You know what is effectively free? My time! My time & my elbow grease are both quite free indeed.

So here we go.....My first idea was to soak the hardware in paint thinner. Paint thinner would soften/thin the paint and I could scrape/rub it off.
A relaxing bath of paint thinner for the
hardware

Just soaking away in the paint thinner

I started with 4 trays to test out how it worked
You might guess how it worked. It didn't. It didn't really touch the paint; it was not softened, it was not coming off - it was as though I had soaked the hardware in water! See for yourself:
Yeah. The paint is pretty much all still there. Paint thinner fail!
 I was not dissauded - I knew I would prevail over the paint - I just needed a new strategy! The new strategy was to strip. No, not taking off my clothes you weirdo - that would in no way help to get 110 years of paint off of the hardware! I used a soy based gel stripper made by Franmar on the paint. After letting it sit for 24 hours - this is what the paint looked like:
Do you see the bubbling? The paint is pulling itself off
of the hardware! Or at least the top layer of paint is! 
Look at that paint - its basically falling
off of this door hinge!
I was so pleased to see how effective the stripper was on loosening/softening the paint. Now on to the scrubbing/scraping.
Before the stripper

After the first 24 hours in stripper and some elbow
grease scraping the softened paint off
Time to do it again  - more stripper; more scraping/picking/rubbing at copious amounts of paint.
Now, that is what I call green paint. Seriously, truly
make an f-ing statement green paint.

More hardware in progress....
Making serious progress after my 4th time letting the stripper sit for 24 hours
and vigorously scraping the softened paint off.
Now that I have the vast majority of the paint off; it is time to tackle the years of grimy build up on the unpainted pieces; plus shine everything. Next step was green scratchies (or scrubbies....what does your family call these?? They are indispensable! I used them with Bar Keeper's Friend to clean/shine all of the hardware. I worked really hard...so hard my arm muscles were twitching by the end. It was worth it though; check out the process & end results!
Top: after some serious scrubbing
Bottom: post stripping, pre scrubbing

7 of the 9 sets after the scrubbing - all done! Now the
trim carpenters need to install the doors so we can find homes
for all of this hardware!
Bar Keepers Friend is your friend if you
have metal that needs TLC :)
Done! Hooray!

Yippee!!

I won't lie - I'm happy this project is over!

The fruits of many hours of scrubbing

I dig the copper tone most of the hardware turned out to be

 So darn pretty

There seems to be lots of different metals in play
in each set of hardware; not sure why - but not 
offended by it either

This came out of the "miscellaneous"
bag of hardware - it doesn't match the style
of anything else - I have no clue where
the carpenters found it; but I like it
As happy as I am that I did breathe some new life into this old hardware; I'm not sure if I'd sign up for all the work again! Hopefully it will all be worth it once the hardware is installed!