Our House

Our House
Before: House. After: Home!
Showing posts with label doors. Show all posts

Sunday, July 17, 2016

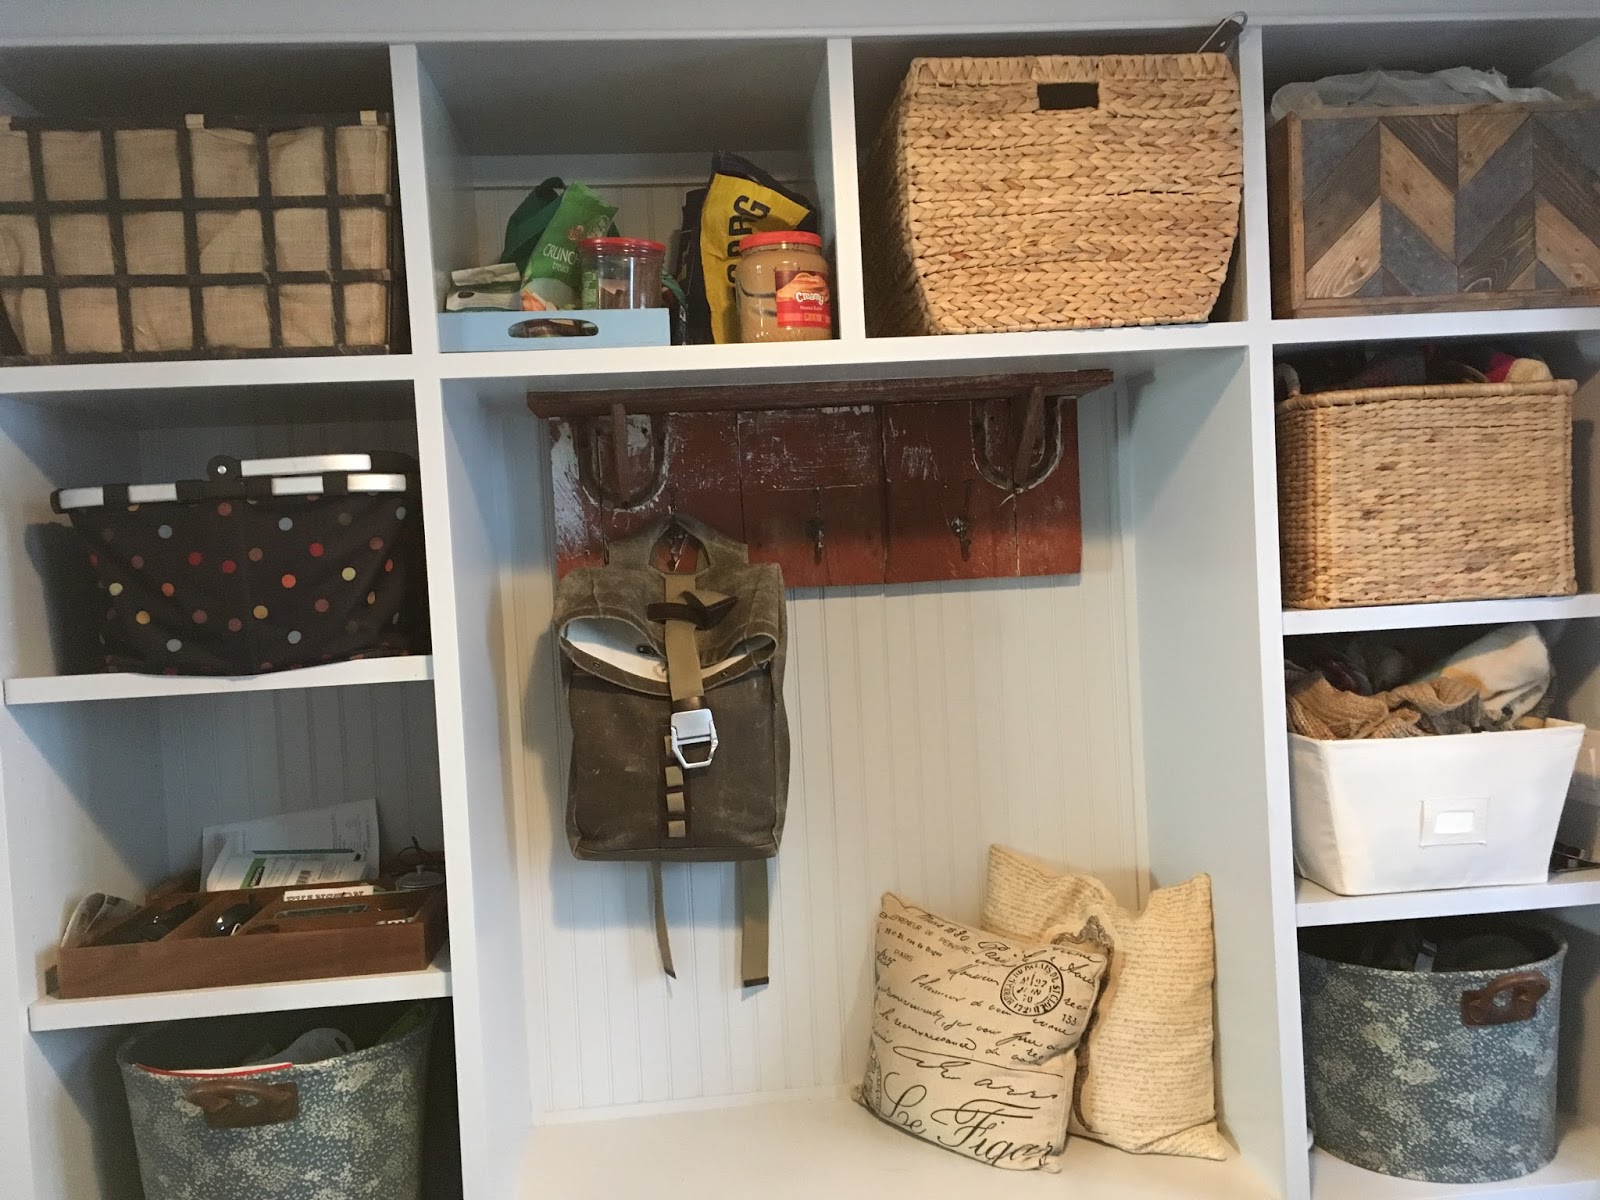
Mudroom built in......before & after over many months


We were so excited to have our mudroom finished off with some built in storage! It was a project that could wait until after we moved in, so it did :)

Our carpenters built the built in on site in early June, 2016. The painters came back to paint it in July!
Mudroom built in's future location....doesn't look like much now!

The bench/first set of cubbies are in!
The top row of cubbies are assembled in the kitchen!
Side sets of cubbies have adjustable shelves, so cubby size can change
Ta da! All done! Even have our barn wood hooks installed in the center, so we can hang coats/bags.
Just waiting on paint and our permanent side door........I'm tired of the temporary door!!


January, 2017 - full of all of our stuff! Verrrrry full!

All stocked up & done with the built in.
Plus- the new side door is finally installed!

Looking down the basement stairs, we installed more hooks everywhere;
winter in this part of the world requires so many coats! At the landing of the stairs is a set of
hooks on barn wood (wonderful housewarming gift from GR & Tara) where we stash
our most used gardening gear. Don't have much need for it these frigid days....currently the
wind chill is -6 degrees. Home sweet home!!

Thursday, July 14, 2016

Extra door turns into a headboard

We have some doors lying around in our basement. They live in what I call the 
"treasure pile". 
Treasure pile with 3 doors and 1 door frame

Treasure pile #2
3 more doors :)

Half of Treasure pile #3....couldn't fit the rest into the photo!
Not pictured -
one more door in its own Treasure pile #4
Most folks would call it a garbage pile. If they were being generous they might call it a scrap pile. To me- TREASURE! There are all sorts of projects just waiting to be done with our old doors, windows & pieces of wood. They all hold bits of our home's history - which is probably why I want to hold on to them. Or maybe because I am my father's daughter & I hate to throw anything away......could be a combination of the two!

This post (which I found on Pinterest; no one is shocked by that) sparked my interest since we have a glut of cool old doors. I love when I find tutorials for DIY projects that seem do-able. Projects that don't require a shit ton of tools or equipment that I don't have, or have a bazillion steps so I know I'll never motivate to complete them. This project seemed like a pretty good fit for my low level skills! Having my Dad participate was incredibly helpful too - working on projects with my Dad is like sleeping with my baby blanket & teddy bear (who is named Teddy): I don't NEED to do have those things to sleep, but having them makes sleep SO much easier. Same goes for any DIY project I've tackled thus far. I don't bite off too terribly much - so I am fairly confident I could do them on my own; but having Dad come to help makes the entire process not just more enjoyable but quicker & easier too.

I started by washing the door with what I imagine to be a horribly toxic substance called TSP (Tri Sodium Phosphate). 
See the difference the TSP made on the sunporch walls?
Happily scrubbing away.....
It was recommended to me by a woman who does a lot of home painting projects for her interior decorating clients; so I knew I could trust that it would work. If you caught me washing our sunporch walls you would've noticed I was using the same product for that job. It cuts through grease/grim/dirt/smoke with ease. Between the door & the sunporch walls I had all 4 of those nasty substances!
I forgot to take a "before" washing photo - hence showing the
power of TSP above!
Next I had a pretty good time making a "custom" paint color. By custom I mean I dumped a whole bunch of leftover samples of blue paint into my tray & mixed well. We spent a stupid amount of money on paint samples for the house; so I figured I may as well get some mileage out of them!!
Mix mix mix!

I like how the colors swirled together
I taped the plate on the door so I wouldn't paint over it. I think it is pretty & reinforces the fact that we recycled a door into a headboard in our 2nd guest bedroom!

Then I painted the door; two coats to make sure the color was as rich as possible - but I didn't bother to paint or wash (as I sadly discovered when we put the headboard on the frame) the back of the door. I figured no one would see it which is true- though I could've washed it for God's sake. Its pretty gnarly back there.

Dad & I had some purchasing issues for the bolts that would connect the door to the 2x6s that hold the door up (they also connect the metal bed frame to the 2x6s). Dad went to the hardware store once & I went no less than 3 times before we finally had the right bolts. Oops. What a giant waste of time!!

Once we had the materials we finished the project really quickly- probably only an hour or so to get everything measured (to be sure we had the door centered) and connected!
Using our TV box to protect the mattress,
Dad is lining up the 2nd 2x6 support. We
bolted both supports to the metal frame
near the floor before moving up and bolting
the headboard to the 2x6s

No yet secured - notice the scrap wood between the door
and the TV box? We're making progress though!
We love the new bed! I still need to touch up the paint near the plate & also paint the
 2x6 where it is visible; but that will happen another day :)
Hope you enjoyed this project as much as I did! We are really quite pleased with the final product! We have also had our first overnight guests (my sister & niece) so the bed was tested & worked! Special shout out to my Mom who gave us the pretty coral pillows and my sister who gave us the Euro sham cases!  It takes a village to decorate a guest room!

Update February, 2017:
Dad helped put the finishing touches on this project this week! I am so thankful that Dad has a bazillion tools & knows how to use them & is willing to teach me!

I have wanted to add lights mounted on the door headboard since we started the project.....but the lights, cords, switches, etc sat in boxes under my desk (which lives in this guest bedroom) for 7 months before I admitted defeat and finally asked Dad if he could spearhead this part of the project. I bought wall mounted fixtures that are intended to be hardwired into building power; but I wanted to add switches & cords so the lights can function like a reading light/bedside lamp.

I didn't take any photos during the project, but here is the final result:

Yipee! Lights are on the headboard!

I am THRILLED! Finished just in time to have friends visit for President's Day Weekend!!

Sunday, April 10, 2016

Stripping and Scrubbing New Life Into Old Door Hardware

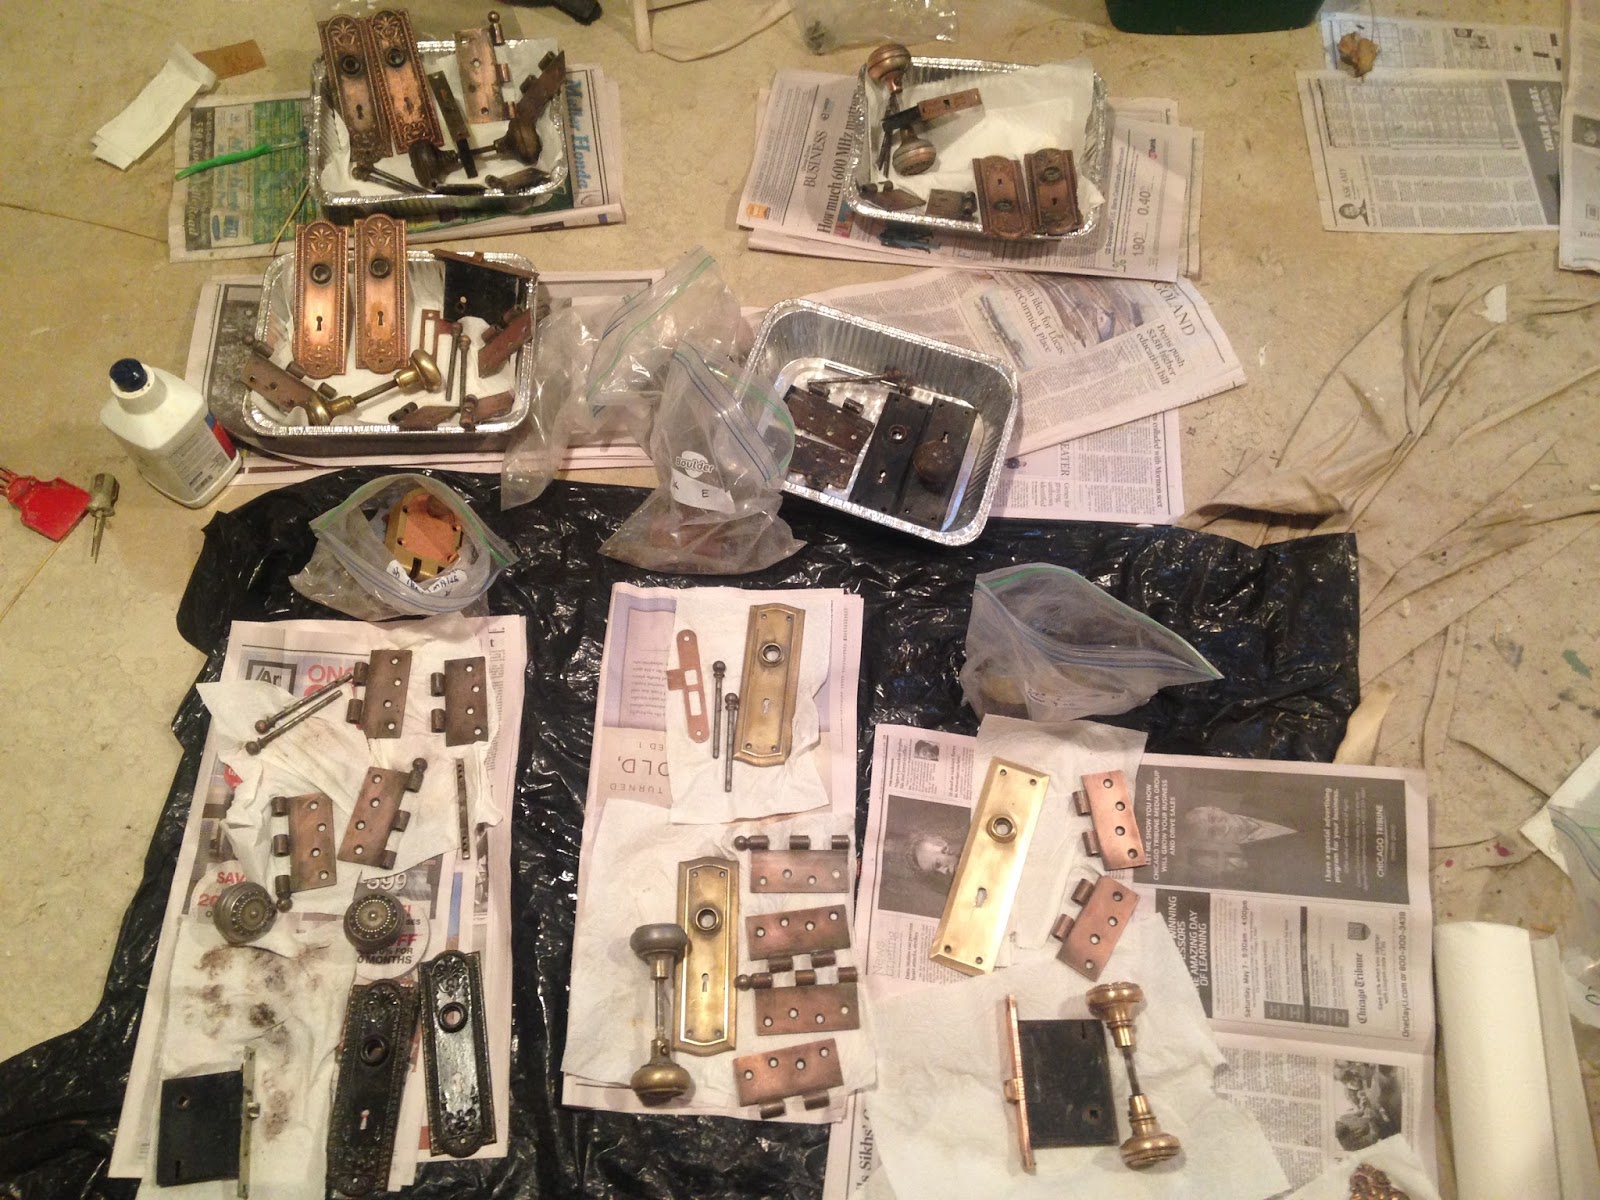
Holy Moly. When our trim carpenters took our doors out of the house to clean them up, I kind of thought they would also be cleaning up the hardware. They would have - they absolutely would have cleaned up the old hardware; buuuuuuuuuut we would need to pay for their time to do it. You know what is effectively free? My time! My time & my elbow grease are both quite free indeed.

So here we go.....My first idea was to soak the hardware in paint thinner. Paint thinner would soften/thin the paint and I could scrape/rub it off.
A relaxing bath of paint thinner for the
hardware

Just soaking away in the paint thinner

I started with 4 trays to test out how it worked
You might guess how it worked. It didn't. It didn't really touch the paint; it was not softened, it was not coming off - it was as though I had soaked the hardware in water! See for yourself:
Yeah. The paint is pretty much all still there. Paint thinner fail!
 I was not dissauded - I knew I would prevail over the paint - I just needed a new strategy! The new strategy was to strip. No, not taking off my clothes you weirdo - that would in no way help to get 110 years of paint off of the hardware! I used a soy based gel stripper made by Franmar on the paint. After letting it sit for 24 hours - this is what the paint looked like:
Do you see the bubbling? The paint is pulling itself off
of the hardware! Or at least the top layer of paint is! 
Look at that paint - its basically falling
off of this door hinge!
I was so pleased to see how effective the stripper was on loosening/softening the paint. Now on to the scrubbing/scraping.
Before the stripper

After the first 24 hours in stripper and some elbow
grease scraping the softened paint off
Time to do it again  - more stripper; more scraping/picking/rubbing at copious amounts of paint.
Now, that is what I call green paint. Seriously, truly
make an f-ing statement green paint.

More hardware in progress....
Making serious progress after my 4th time letting the stripper sit for 24 hours
and vigorously scraping the softened paint off.
Now that I have the vast majority of the paint off; it is time to tackle the years of grimy build up on the unpainted pieces; plus shine everything. Next step was green scratchies (or scrubbies....what does your family call these?? They are indispensable! I used them with Bar Keeper's Friend to clean/shine all of the hardware. I worked really hard...so hard my arm muscles were twitching by the end. It was worth it though; check out the process & end results!
Top: after some serious scrubbing
Bottom: post stripping, pre scrubbing

7 of the 9 sets after the scrubbing - all done! Now the
trim carpenters need to install the doors so we can find homes
for all of this hardware!
Bar Keepers Friend is your friend if you
have metal that needs TLC :)
Done! Hooray!

Yippee!!

I won't lie - I'm happy this project is over!

The fruits of many hours of scrubbing

I dig the copper tone most of the hardware turned out to be

 So darn pretty

There seems to be lots of different metals in play
in each set of hardware; not sure why - but not 
offended by it either

This came out of the "miscellaneous"
bag of hardware - it doesn't match the style
of anything else - I have no clue where
the carpenters found it; but I like it
As happy as I am that I did breathe some new life into this old hardware; I'm not sure if I'd sign up for all the work again! Hopefully it will all be worth it once the hardware is installed! 

Wednesday, January 6, 2016

Bonjour les Portes Françaises

Translation: Hello French Doors!

Clearly I'm having a French kind of day with the post titles. I do love the language - though my great friend who has been a high school French teacher for years would likely wish I had asked her to translate........rather than Google translate :)

Our master bedroom (and the 2nd floor generally) is going to have a good bit more light now that our French doors have been installed.

Either way, here are our new doors:

Someday we will wake up & look out these doors. Hopefully that day is sooner rather than later!

Opening out to the sun porch; envisioning this in the spring
& summer is making my day.
Assuming we leave our bedroom door open,
we will be able to see out of the French doors
from the front of the house!