Our House

Our House
Before: House. After: Home!
Showing posts with label stairs. Show all posts

Sunday, December 27, 2015

Goodbye Ladder- Hello New Basement Stairs

No more sketchy ladder to get down into the basement - we've gotten an upgrade!

Standing at the top of the brand spanking new basement stairs!
They will be just inside the new side door.

I suppose it is the little things, but I was so excited to
walk down these stairs for the first time!

Saturday, October 17, 2015

Demo Days 5 & 6 - The Walls Come Tumbling Down

I mean, really, they are. The walls are dropping like flies! Two more days of demolition this week meant such eye candy for Chris & me. 

Day 5 saw the wall between the 1st floor kitchen & 3rd (back) bedroom come down. The wall between the 1st floor 2nd bedroom & back stairs came apart, just enough to look through. The east wall of the first floor kitchen lost its plaster. The garbage continues to pile up in epic fashion; we're still playing a waiting game with the permits......and the dumpster. We brought some crowbars over to the house to go on a bit of a treasure hunt on the 2nd floor. We were hoping that someone had stashed (& then forgotten about) bars of gold or boxes of money in the built in cabinet accessed from the bathroom. The doors to the cabinet were painted shut; so Chris knocked them in. No treasure. Sort of disappointed :( Its always fun to break stuff though!
You can see straight through the
1st floor from front to back!
Chris wielding the crowbar


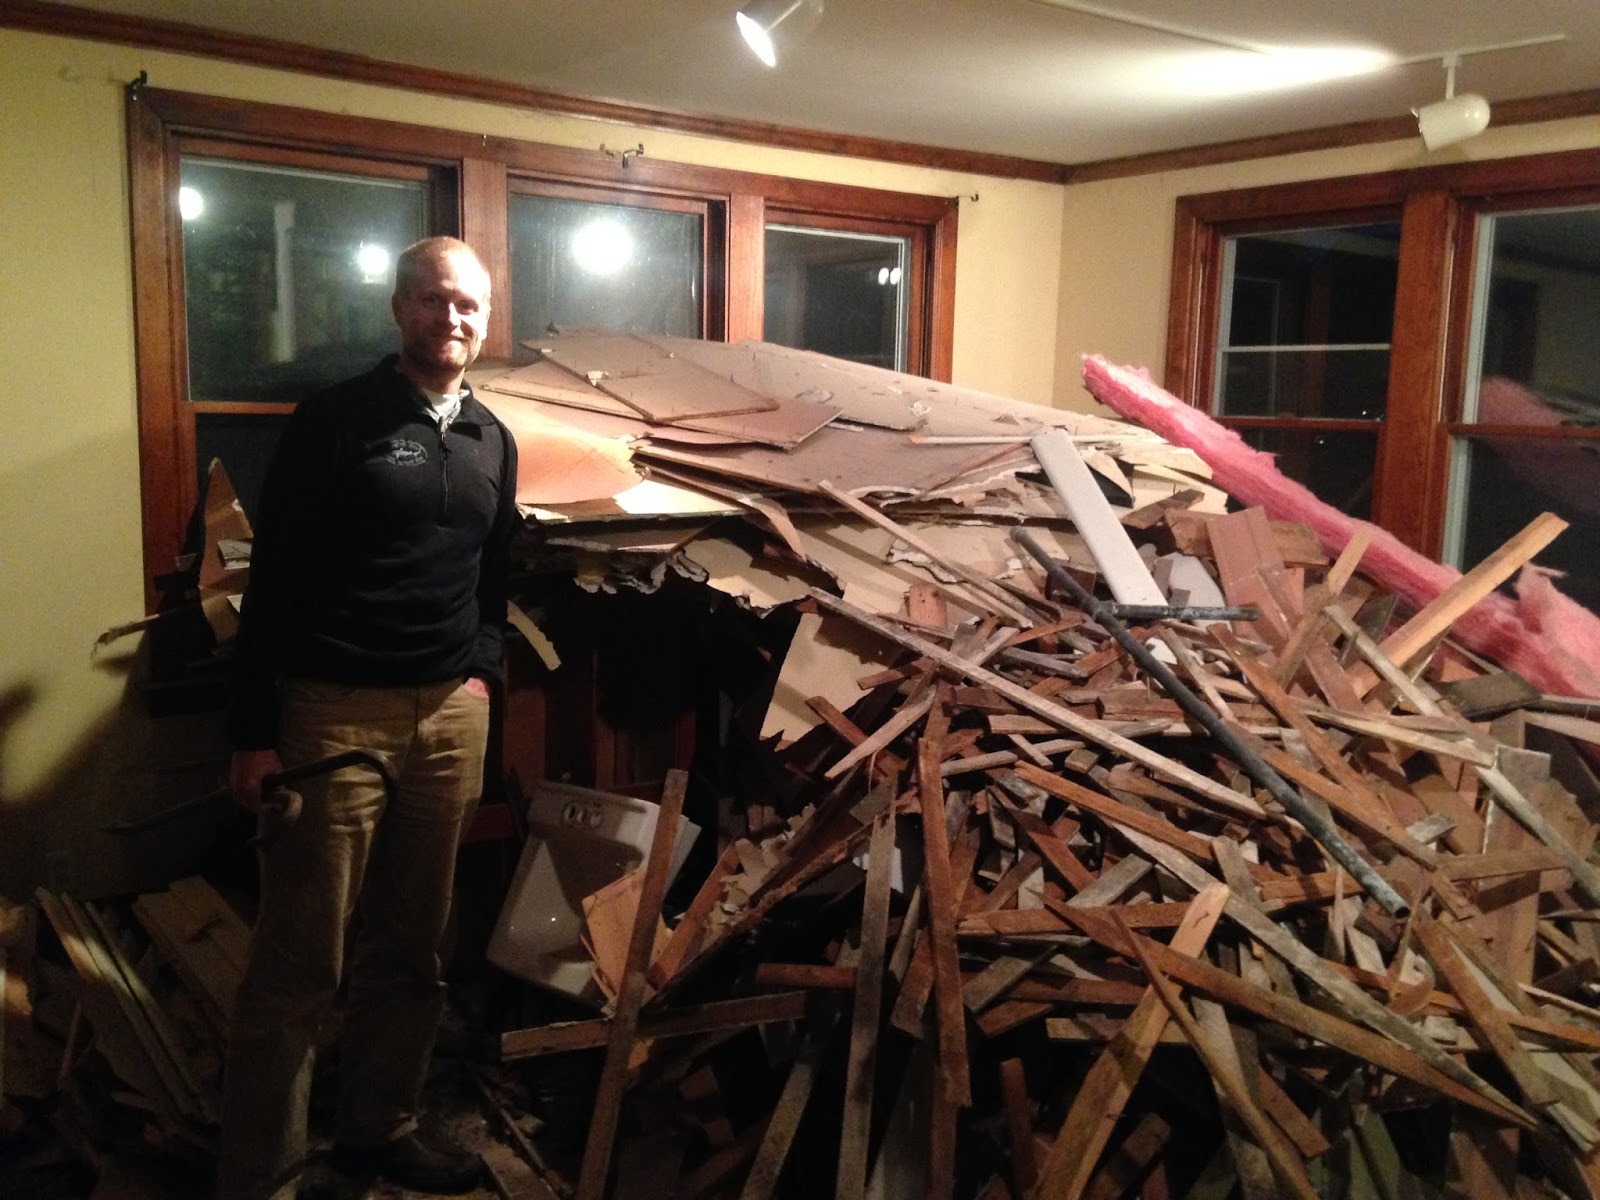
The debris pile keeps growing in our future family room
Our living room rocks both a stove & fridge.
Oh & some sinks.

Just the right size to peek through to the back stairwell

Day 6 was even more dramatic. The back stairs are completely gone. Giant hole from the 2nd floor down to the basement! The walls between the 1st & 2nd floor 2nd bedrooms and the back stairwell are gonezo! Its insane. We can now look from the top of the front stairs all the way back to the back wall of the house! We can get a sense for the size/shape of our future kitchen on the 1st floor & our bedroom on the 2nd floor. The debris from the demo is getting comical, if it wasn't already. There are piles everywhere! I continue to be so happy with the guys doing the work. They've kept things as tidy as is possible given our dumpster-less situation. They continue to sweep up at the end of each day. Its the little things, right?
We love the treasure hiding in the walls. This page from the
"Chicago Evening American" is dated Tuesday
May 8, 1928. That is a really long time ago!

Chris pondering the 2nd floor through
the hole where the back stairs had been. Note the piles...
growing, growing, growing.

The old 1st floor kitchen was on the left
Chris is standing where the closet for the 2nd bedroom used to be.
Feeling on top of the world on the "pantry platform"
From my perch at the back of the 2nd floor I can see
down through the old stairwell into the basement!

View from 2nd floor kitchen pantry down through the floor
all the way to the basement!


Sunday, August 16, 2015

Oh carpet, you seem endless

And you are time consuming to rip out. 
But, as I type this, 100% of the carpet that was in our house when we bought it, is now in the garbage. Please note- I hate adding huge amounts of trash to landfills - but the carpet really had to go. It was in such rough shape I didn't think anyone would want to use it for anything.

Here are the things I suspect some previous owner of our home thought when installing this carpet:
-Its durable!
-Its easy to clean!
-It is cozy!
-It masks construction quirks after the back room was added to the first floor!

Here are the things I think about the carpet:
-It is durable!
-It is impossible to make look clean!
-It looks a bit like it fell out of the ugly tree & managed to hit most of the branches on the way down.

So, feast your eyes on some before & afters :)
 In progress- 1st Floor - 1st Bedroom

 In progress- 1st Floor - 1st Bedroom - very serious business for Chris

In progress - 1st Floor - 1st Bedroom
Before- 1st Floor - 2nd Bedroom

After -1st Floor - 2nd Bedroom

After - 1st Floor - 2nd Bedroom
Before - 1st Floor - 3rd Bedroom (yes its off the kitchen & no it won't remain a bedroom in our plans!)

Before - 1st Floor - 3rd Bedroom - like the berber? Looks good, right?


In progress - 1st Floor - 3rd Bedroom - always looks worse before it looks better ;)
Almost done - 1st floor - 3rd bedroom - we love how pretty the wood is!
Almost done - 1st floor - 3rd bedroom - don't mind the mismatched wood, the badly patched wall, or the giant post. That's what our general contractor is for!
After- 1st Floor - Foyer - who knew the bottom step would be the worst carpet removal in the whole house?!?

After - 1st Floor Foyer - hard to tell....but under the green tile & black adhesive stuff is wood flooring....the big question is; is is salvageable??

Tuesday, August 4, 2015

Adios gnarly tile....hola treasure!

Treasure under the tile on the back stairs!
This is the type of thing Chris & I were hoping we would uncover during the DIY demo phase, the front page section of the Chicago Sun dated Friday December 22, 1944!
Chris pulling up the plain black tile that covered the landing
Old timey movie ads


The ads interest me as much as the articles!

Who wouldn't want the Sissy Sailor hat?!?


The back stairs will be removed completely by the general contractor; but I am so happy Chris made the move to pull up this 1 random piece of asbestos tile (kidding about the asbestos...sort of)! Somehow I feel more connected to the history contained in this section of the newspaper than I would if I found it on microfilm at the library (side note - does microfilm/microfiche still exist??). It makes me interested to know why someone would lay down newspaper over painted hardwood, under a plain Jane piece of tile. To even out the height? To give cushion/padding? I would love your thoughts in the comments if you have any!

Monday, July 20, 2015

Goodbye Carpet on the Stairs

I don't have anything against carpet, per se. I do have a big problem with stained, old, worn out beige berber carpet covering the front stairs & foyer.Chris & I were really hoping to find hardwood under said nasty carpet & we did! 

Before- gross carpet on the front steps

This was our first experience ripping out carpet and it was satisfying to be sure. Taking the carpet off is relatively easy once you get a corner of it up. The pad comes off just as easily. 


First stairs showing
Hooray! Hardwood!
Next up are the staples, which came out pretty easily, we used pliers to grab them straight out. The stubborn/flattened staples were forced out using a flat head screwdriver. We were trying to be mindful not to gouge the wood because we are keeping it. We are excited at the prospect of keeping as much of the old house that we can - including things like hardwood. The contractor will refinish the stairs once the "real" work begins - but our efforts have paid off already.


The trouble is these beastly things.
After - in the garbage!
Before- evil plywood on steps
I don't even know what they are called, but they are strips of plywood that are nailed into the stairs and have nails pointing up into the world. Horrible to remove. The plywood splits & splinters & shreds out in a very unsatisfying way. 

Good thing I have my Dad to give me advice; I had no idea how to get this pesky pieces of nail filled plywood off of the stairs. Dad did (which is a shock to approximately no one). Again, I don't know the name of this wonderful tool - but it worked wonders. If you are removing carpet - do not begin without spending $14.99 on this tool at your local hardware store!
The wonderful tool! Plus a close up of the evil plywood.
Another huge help for this project were the 2 pairs of knee pads our (lovely) tenant found while she cleaned out the basement before she moved. We could not have done this project without them, as we spent a couple of hours hunched over on our knees pulling out the staples & strips of awful plywood. 

It was dusty work and there were shards of plywood & sometimes nails flying around (I had to use a lot of force with the fulcrum tool to remove some of the plywood strips) so I took the appropriate precautions. Though I'm not big into selfies...this was too funny not to photograph!
Looking good - safety first!
We were so very excited to finish the stairs - they look SO much better already! I'd love to hear about your experiences taking out carpet - if you've ever tried. We've been encouraged so much by this DIY effort, we're going to keep on trucking to see what other treasures we find! 
After - voila! Hardwood!